Avocado Pre-Poo Treatment with AvoPure

If you are like me you love a good DIY treatment for your hair and skin. There is something lovely about making your own products that cater exactly to your beauty needs. One of my favorite natural ingredients to use in my treatments is avocado. It is a beautiful nutrient rich superfood that is just perfect for getting your life together.  However there are a few setbacks in the use of avocados: outside of living in California they are never picked fresh and you have to catch them within that ripeness window, out of season they can be pretty pricey, and they don’t lend themselves to partial use. AvoPure

I was contacted by AvoPure, a New Zealand based company that specializes in avocado powder.  This foodgrade powder is perfect for use in nutricosmetic applications such as face masks, hair conditioners, soaps or balms.

From their website:

Avocado is often called a ‘food for the skin’. Nutrient dense, it has superb natural moisturising and anti-ageing properties.  And with AvoPure avocado powder, you can harness the goodness and health benefits of premium New Zealand avocados in your personal care and cosmetic products.  Being 100% pure, with no additives, fillers or manufacturing residues, AvoPure avocado powder can be combined with other ingredients without risk of chemical conflict.  The light weight, soft and incredibly fine powder provides a highly flexible base medium for cosmetics and personal care products.

Needless to say I was happy to get my hands on the packets and start playing around with recipes.  The advantages to using AvoPure avocado powder over actual avocados is that you can use as much or as little as you want, you don’t have to worry about spoilage, and it is much easier to incorporate the powder into your treatments.

DIY Avocado Pre-Poo

  • 3 oz Safflower oil (or your favorite oil)
  • 1 Tbsp AvoPure avocado powder
  • 2 oz conditioner
  • Color applicator bottle (example)

Gently warm the oil, I popped mine into the microwave for a few seconds then pour into the color applicator bottle. Add the AvoPure powder and shake until well mixed. Add your conditioner of choice then shake again.

To use: This is a pre-shampoo treatment.  Section your hair into four – six workable sections. Apply the mixture to the hair from root to tip massaging gently into the hair. Cover with plastic cap and allow to penetrate for 10-15 minutes. Shampoo and condition hair as normal. AvoPure Avocado Prepoo

For me my hair felt both soft and strengthened after using this pre-poo treatment as compared to my weekly shampoo and condition regimen.  I had wore my hair out in an afro for most of the week so it was very dry and tangled.  The pre-poo treatment really helped melt the tangles away and made quick work of my detangling session.  I am going to incorporate the AvoPure avocado powder in future skin and hair treatments and report back my findings.


Springtime Salt Scrub

Spring is officially here and what better way to bring in the season than to scrub away Winter?  When I think of Spring thoughts of citrus and jasmine are the first to my mind so those are the essential oils I selected. This DIY salt scrub is easily customizable using ingredients from your local grocer or health food store.

image

Springtime Salt Scrub 

  • 1/2 cup fine Dead Sea Salt
  • 1/3 cup Safflower oil
  • 5 drops Jasmine essential oil
  • 3 drops Orange essential oil

In a medium size bowl pour in sea salt.  Next stir in safflower oil, continue stirring until well incorporated. Lastly add essential oils and stir once more.  Pour mixture into airtight container and store away from sunlight.  When ready to use lightly dampen skin with water and apply scrub in a circular motion all over the body avoiding the face paying special attention to elbows, knees, hands and feet.  Rinse thoroughly and pat dry with a towel.

How to Make Whipped Fluffy Body Butter

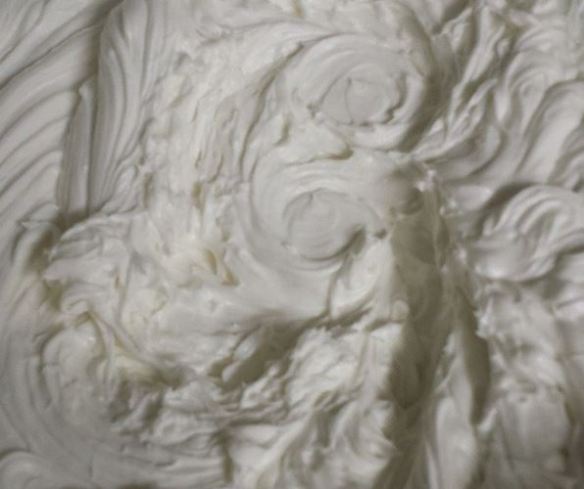
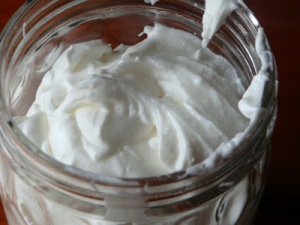
Whipped Fluffy Body Butter

You asked, I finally got around to posting this video on how I make my whipped fluffy butter. This is a basic recipe that is very customizable. You can experiment with interchanging the different butters and oils like swapping mango butter for shea butter or substituting olive oil and castor oil instead safflower oil.  This butter behaves differently at different temps, for example my coconut oil is a liquid in the Summer and Fall but more of a soft solid in the Winter and Spring. You can help balance this by using harder butters to make a firmer product.  I throw in whatever I have on hand, never making the same butter twice and have never had an issue. 

My recipe is different from others because it is a moisturizing or wet butter. It contains aloe vera gel (or juice) and glycerin to add moisture. You will notice a difference in how your skin feels after using.  I do not use any preservative ingredients, but the butter will last for 30-45 days in a room temp environment without mold. We normally use up the entire batch within this time frame and then I simply make more.

In my home this is used primarily as a body butter. I have gifted this to friends and family who use it as a beard butter and as a hair butter.

Whipped Fluffy Body Butter Recipe

  • 2/3 cup shea butter
  • 1/2 cup coconut oil
  • 1/4 cup safflower oil
  • 1 oz cocoa butter
  • 2 Tablespoons glycerin
  • 1/2 cup aloe vera gel (or juice)

Combine oils and butters and gently heat over a double boiler until just melted.  Allow to cool to room temperature then add glycerin and aloe.  Whisk together ingredients and pop into refrigerator.  Allow the mixture to cool until it is a firm set but not too hard. Use mixer starting on low, then increasing in speed to whip the mixture until it doubles in size.  Store in airtight containers away from heat and direct sunlight.

DIY Coconut Avocado Sugar Scrub via @the_WildSeed

Yesterday while talking about my skincare regimen, one of my tweeps @The_WildSeed chimed in commenting that she makes her own exfoliant and was kind enough to allow me to share her recipe.  I like to exfoliate my skin (face included) one to two times a week. Such a small gesture can have wonderful effects on your skin.

diy sugar scrub

@The_WildSeed’s Coconut Avocado Sugar Scrub

What You’ll Need:

  • glass jar with lid
  • coconut oil
  • avocado oil
  • essential oil
  • sugar

Mix equal parts of coconut oil and avocado oil with a few drops of essential oil (I like lavender) set aside.  Place sugar into glass jar then add the oil and mix. As a rule, you want just enough oil to coat all the sugar, you still want the exfoliating properties of the sugar.  Add a couple drops of tea tree oil if you suffer from severe skin issues (eczema).

Haley’s Notes: When I make a scrub I use about a 1:1 ratio of liquid to exfoliant.  Start with 1/2 cup which should be enough for a few applications. You can use any kind of sugar. I suggest using a fine grain if using on your face or a coarser grain for feet/elbows.  You can use any type of oil you like or have laying around. Exfoliate your skin by massaging the scrub in small circles for several minutes then wash and rinse as normal.

Click here for more DIY hair and body recipes. 

DIY Pineapple Beauty Treatment

Pineapple is a tropical plant who’s fruit and juice is used in cooking all over the world.  Pineapple contains a natural enzyme, bromelain, which is an exfoliating enzyme that digests dead skin cells.  You can use pineapple in your beauty regimen to remove dead skin cells, balance the skin and even overall appearance.

When using pineapple in skin care remember fresh is best. If you cannot get fresh pineapple opt for canned pineapple in its own juice with no added sugar or pineapple juice with no added sugar.

Pineapple Juice Toner

Apply pineapple juice to clean skin using cotton ball, allow to sit for 5 minutes then rinse thoroughly with water.

Pineapple Restoring Mask

Blend pineapple flesh on pulverize/puree setting until smooth.  Pour into a bowl and add a few teaspoons of honey.  Apply mask to face, massaging in circular motion and let sit for 5 minutes.  Rinse skin with warm water and pat dry.

Grab fresh pineapple, mash it up mix with a little honey to help form paste apply to skin. No rubbing required.

An here is a little tasty libation a la Lola Zabeth: Drunken Sponge Bob

  • 6 ounces fresh pineapple (or 1/3  can of pineapple in juice)
  • 2 ounces rum
  • sparkling water

Place pineapple into freezer until cold.  Blend pineapple flesh and rum on pulverize setting until smooth.  Spoon pineapple mixture into glass, add sparkling water and stir.  Sip and enjoy.  This also makes a delicious drink sans rum, but in my opinion everything is better with rum :)

Lola Zabeth has great recipes on her site including this one for a pineapple scrub.

DIY Hibiscus Hair Rinse via Anita Grant

You know I am a sucker for natural recipes.  This awesome hair rinse comes courtesy of Anita Grant.  This quick and easy rinse is great for covering greys and will add a deep rich red stain to your hair.  Ideal for those with red, brown or black hair as a natural hair stain that will work on all hair types and textures.  Along with staining the hair Hibiscus will also strengthen the hair, seal the cuticle and stop breakage.
Hibiscus Hair Rinse

In a medium sized pot bring water to a boil over medium heat. Add a handful (about 1/4 cup) of dried Hibiscus flowers and reduce heat to simmer for about 7 minutes.  Remove from heat and allow the mixture to cool. The water will turn a deep red/purple color.  Strain the flowers out and store rinse a clean air-tight container.

To Use: Cleanse your hair thoroughly careful to remove and dirt, oil and residue.  Pour the Hibiscus hair rinse over your hair careful to saturate your strands.  DO NOT RINSE OUT. Cover your hair with plastic cap then wrap in a warm towel.  Allow the rinse to sit on the hair for about an hour.  Rinse your hair thoroughly with warm water.  This rinse can be used weekly to maintain gray coverage.

Please note: Hibiscus is a STAIN, like henna, and it will stain your clothes, counter tops or other porous materials.  Take proper precautions by wearing old clothes, laying down newspaper on counter tops and/or wearing gloves.

New to Vitacost.com? Use my referral link for $10 off your first order.

DIY: Coconut Hair & Body Cream via Roots4U45

I adore YouTuber Roots4U45, she is like the Black Paula Dean of natural hair and body products.  I love watching her vids, they are informational and inspirational.  Here is a simple hair and body cream that is shea butter free for those of you who cannot use or do not like shea butter.  Incredibly simple. Click the link to watch her video.

Coconut Hair & Body Cream

  • 1 part coconut oil
  • 4 parts vegetable shortening

With items at room temperature, scoop into mixing bowl.  Stir with a spoon until well blended.  Store mixture in a airtight container at room temperature out of direct sunlight.

Now I know some of you are thinking vegetable shortening…you mean Crisco? Yes m’am. I know the use of Crisco in a hair or body product may seem cray, but seriously it is just mix of soybean oil, palm oil and preservatives. Besides if it is good enough to eat it is good enough to put on your skin.

Are you willing to try it? Leave us a comment stating why or why not. And if you do try it please come back and share your results.

DIY: Rice Wine Vinegar Wash

I love vinegar! I keep 3 different kinds of vinegar in my house at all times. It is so versatile in  its use as a kids-safe household cleaner, laundry stain remover, metal polisher and of course for cooking. But the primary use for vinegar in my home is as a natural hair cleanser. 

Vinegar is really just bad wine; take some fruit ferment it and in the process you make acetic acid which along with water make vinegar (this is a gross simplification).  There are as many different types of vinegar as there are grains and fruits to make it from.  When choosing vinegar for your hair I use Apple Cider Vinegar (ACV) or Rice Wine Vinegar which are much lower in pH then household white vinegar.

Rice Wine Vinegar Wash

  • 1 oz (2 Tbsp) Rice Wine Vinegar
  • 2 oz (4 Tbsp)  Aloe Vera Gel
  • 5 oz water

Pour ingredients into a spritz bottle.  Apply top and shake vigorously until well blended. I use the aloe as a thickener which helps keep the mixture from being runny and it is also soothing to the scalp.  The spritz bottle simply makes it easy to apply the mixture to the hair.

To Use: Section your hair into 6-8 sections. Spritz vinegar mix on scalp and throughout length of the hair. Agitate with fingertips, squeeze out vinegar and dirt then repeat.  Allow to sit on hair for 5 minutes then rinse with warm water. Repeat if necessary.

This RWV wash is great for removing build-up of dirt and oil. It is also good for those with dandruff or itchy scalp due to the acetic acid.  The acidic nature of the vinegar will help close the cuticle making hair appear shiner and less frizzy.

For more tips on using natural household cleaner for your hair or locs check out this post. Also, check out this jazzy infused vinegar recipe from lola zabeth.